


To Renewing\Extending Membership for the next period in SquareHubs, follow these step-by-step instructions!
4. Admin will have the action field as below for User Membership update.
6.Admin can select the current membership information and scroll to the right for the EDIT button, which allows the admin to Renew current Membership by extending the expiry date, Change Membership Type for Current period, Change Membership Type for next period, Edit Membership in free Form.
7.Selecting “Renew current Membership by extending the expiry date” option will extend the user current membership to one more year.
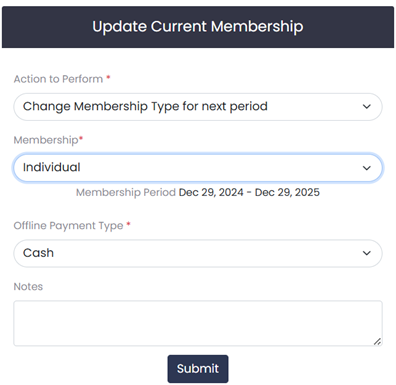
8. Selecting “Change Membership Type for next period” option will allow to change the membership other than the current and extend the user membership to one more year.